Retrieving and Organising Mars Rover Images with NASA’s Open APIs
- API key and creating the URI
- Creating the HTTP request
- Parsing the response JSON
- Find this project on Github
- Run it!
- Summary
Today’s post will cover one of NASA’s Open APIs used to retrieve Mars rover images. I’d recommend checking this list out. You can find all sorts of APIs there, from accessing NASA’s Exoplanet Archive Database to getting photos from Earth’s Polychromatic Imaging Camera (pretty EPIC I know). If ever you find yourself wondering what the weather is like on Mars, well, there is an API for that too.
Before getting started, you’ll need an API key. You can get one at the link above, just scroll down to the Generate API Key section to sign up.
API key and creating the URI
With an API key, we can begin by constructing a URI. There are a few different query parameters that can be passed, but we’ll focus on fetching all camera images for a particular rover by the Martian sol.
String apiKey = "ENTER YOUR KEY HERE!";

StringBuilder uriSB = new StringBuilder("https://api.nasa.gov/mars-photos/api/v1/rovers/")
    .append(rover)
    .append("/photos?sol=").append(sol).append("&")
    .append("api_key=").append(apiKey);
// https://api.nasa.gov/mars-photos/api/v1/rovers/{curiosity|spirit|opportunity}/photos?sol={sol}&api_key={your key}
Creating the HTTP request
Let’s create a method which returns a HttpResponse object from a URI, and a file path to save JSON to. We can add all the details of creating the request inside this method.
private static HttpResponse<Path> connect(String uri, String filePath) {
    // ...
}
To make the request, we’ll be using the HttpClient introduced in Java 9. But first, we need to create the HttpRequest object used by the client. HTTPRequest.Builder exposes methods for entering the URI, the request method (GET in this case) and a timeout. Calling build() will return the HttpRequest object we need.
HttpRequest request;

try{
    request = HttpRequest.newBuilder()
                .uri(new URI(uri))
                .timeout(Duration.of(1, MINUTES))
                .GET()
                .build();
} catch (URISyntaxException e) {
        System.err.println("error occurred when parsing uri -> " + e.getLocalizedMessage());
        return null;
}
Next, creating the HttpClient involves setting the proxy selector, getDefault() gets the system default selector. Then we can set the client to accept no cookies and always follow any redirects the server may throw at us. In the send method, we pass the request object we just made, and a BodyHandler which will create the file if it doesn’t already exist, or override its contents if it does.
HttpClient client = HttpClient.newBuilder()
            .proxy(ProxySelector.getDefault())
            .cookieHandler(new CookieManager(null, CookiePolicy.ACCEPT_NONE))
            .followRedirects(HttpClient.Redirect.ALWAYS)
            .build();

try{
    return client.send(request, HttpResponse.BodyHandlers.ofFile(Paths.get(filePath), CREATE, WRITE, TRUNCATE_EXISTING));
} catch(IOException | InterruptedException e) {
    System.err.println("error occurred when sending or receiving -> " + e.getLocalizedMessage());
    return null;
}
Parsing the response JSON
You can use whatever libraries you’d like to parse the JSON file. I’ll be using JSON.simple. You can download the json-simple-1.1.1.jar and add it to the CLASSPATH. Alternatively, there is a maven repository you can use. I’m using Gradle, so in my case, I’ll add the following dependency to the build.gradle file:
dependencies {
    compile 'com.googlecode.json-simple:json-simple:1.1.1'
}
ParseJson.java is just a class with a few methods for retrieving multiple JSON values from nested objects and arrays at once. I won’t go into detail about this, but you can find the full source for this project by clicking the GitHub icon at the top of the post.
Let’s now create a ParseJson object to get the photos array from the response JSON.
ParseJson parseJson = new ParseJson();
String jsonString = parseJson.getFileAsString(response.body().toString());
String photosArray = (String) parseJson.getJsonObjectValues(jsonString,"photos")[0];
int photosArraySize = parseJson.getJsonArraySize(photosArray);
And the next step just involves iterating through each element in the photos array and getting the relevant info. With this, we can sort related images into subfolders, including the sol, the rover the image came from, and the camera used to take the image.
for(int i=0; i<photosArraySize; i++) {
    String photo = (String) parseJson.getJsonArrayItem(photosArray, i);
    Object[] photoValues = parseJson.getJsonObjectValues(photo,
            "sol",
            "img_src",
            "rover", "name",
            "camera", "full_name",
            "id");

    if (photoValues != null) {

        long photoSol = (long) photoValues[0];
        String photoImageSrc = (String) photoValues[1];
        String photoRover = (String) photoValues[2];
        String photoCamera = (String) photoValues[3];
        long photoId = (long) photoValues[4];

        // download photo here
    }
}
Finally, let’s create the file path for the photo and download it into that newly created folder.
StringBuilder filePath = new StringBuilder(photoDir)
    .append("sol_").append(photoSol).append("/")
    .append("rover_").append(photoRover).append("/")
    .append("camera_").append(photoCamera).append("/")
    .append("photoid_").append(photoId)
    .append(photoImageSrc.substring(photoImageSrc.length()-4));

downloadFile(photoImageSrc, filePath.toString())
The downloadFile() method will download the photo from the given URI into the file we created. It will create the necessary directories if they don’t already exist.
Well, that’s more or less it. The HTTPClient that first arrived as part of Java 9 makes handling HTTP requests like this a lot easier than using HttpURLConnection.
Find this project on Github
You can check out the source code for this post at my GitHub, just click the link at the top of the page. Using the application plugin, build the Gradle project and navigate to the distributions folder, you’ll find the application packaged as a TAR and ZIP in there.
Run it!
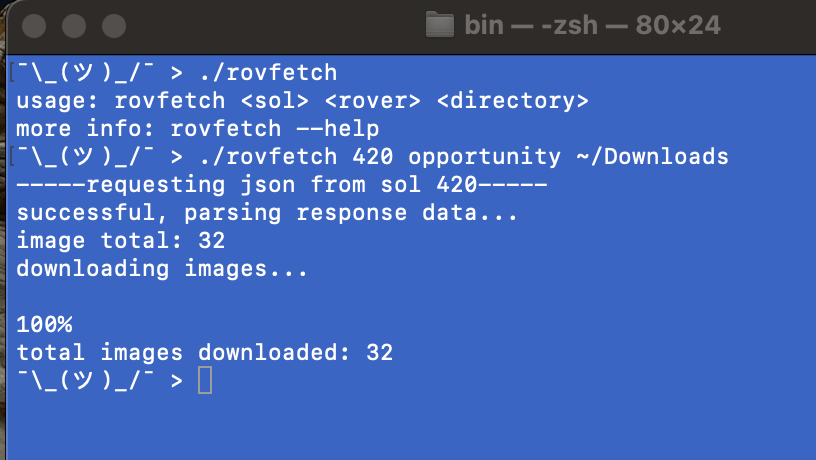
You can run the application by passing the following arguments to rovfetch
usage: rovfetch <sol> <rover> <directory>
- sol: the martian sol to fetch images from
- rover: one of three mars rovers; curiosity, opportunity or spirit
- directory: the resource directory to save JSON and the fetched images
The following example would fetch all curiosity rover images from sol 19 saving them into ./res:
rovfetch 19 curiosity .
Summary
Thanks for reading. Again, you can find the project at my GitHub. Feel free to clone or fork the repository and see what you can change. Maybe you can adjust the query parameters to query by Earth date, or look into some of the mission manifests returned in the JSON. Do check out the other APIs NASA offers too, have fun!